Premier Wonder Grinder Help

timwilde
@timwilde
02/10/16 03:17:59AM
36 posts

This past season I chose to expand the new small business production and got 2 premier wonder grinders. And I'm having problems with both.

When I went to make some white chocolate, it came out a very sickly grey. No off flavors, but just sickly grey. After the first batch like that, I pulled the hub assembly out and saw there is a lot of black lube in the wheel; more specifically it seemed to have hidden/stored in the gap between the two-piece axle shaft assmbly that is epoxied to the wheels.

After trying to clean that out the best I could, I got a less grey, but still sickly looking white chocolate. After cleaning hard again - difficult because of the small opening I had to work with. and yet again another batch (third one) that is unusable because of it's sickly color.

Thus far, it looks and tastes like it's a food-grade lubricant of some sort, which I dont mind, just want it gone so it doesnt discolor my chocolate. I eventually went through both with a dip tube brush from my beer keg cleaning gear, which was the only small scrub brush that I have that would fit in there.

I *think* I've gotten it all out, but now I'm having issues with both assemblies with the wheels seizing.  They "float" across the bottom, but do not spin. When I first saw this, I pulled the assembly and took it apart. There appeared to be plastic or string kinda twined in there. Pulled that out and inspected the wheels but I'm not seeing any damage at all.  I put the other assembly in (2nd machine not in use) to finish the batch, and this one also seized up.

Anyone else having these issues?  I've attatched the grey vs fresh add to the grinder for color comparisons.  This is getting a little frustrating at this point.

I'm currently in the process of emptying the grinder that currently has the siezed wheels. As they get cleaned I'll post pics.  I'm really hoping this isnt due to something stupid on my part. I've been careful to disassemble and reassemble exactly as they were.  Seemed to be working fine with the lube in there other than tainting the chocolate. But now that it's cleaned, not seeming to work right.

grey.jpg
grey.jpg  •  45KB

fresh_add.jpg
fresh_add.jpg  •  28KB


updated by @timwilde: 02/10/16 03:39:38AM
Powell and Jones
@powell-and-jones
02/10/16 02:54:45PM
30 posts

timwilde: This past season I chose to expand the new small business production and got 2 premier wonder grinders. And I'm having problems with both.

When I went to make some white chocolate, it came out a very sickly grey. No off flavors, but just sickly grey. After the first batch like that, I pulled the hub assembly out and saw there is a lot of black lube in the wheel; more specifically it seemed to have hidden/stored in the gap between the two-piece axle shaft assmbly that is epoxied to the wheels.

After trying to clean that out the best I could, I got a less grey, but still sickly looking white chocolate. After cleaning hard again - difficult because of the small opening I had to work with. and yet again another batch (third one) that is unusable because of it's sickly color.

Thus far, it looks and tastes like it's a food-grade lubricant of some sort, which I dont mind, just want it gone so it doesnt discolor my chocolate. I eventually went through both with a dip tube brush from my beer keg cleaning gear, which was the only small scrub brush that I have that would fit in there.

I *think* I've gotten it all out, but now I'm having issues with both assemblies with the wheels seizing.  They "float" across the bottom, but do not spin. When I first saw this, I pulled the assembly and took it apart. There appeared to be plastic or string kinda twined in there. Pulled that out and inspected the wheels but I'm not seeing any damage at all.  I put the other assembly in (2nd machine not in use) to finish the batch, and this one also seized up.

Anyone else having these issues?  I've attatched the grey vs fresh add to the grinder for color comparisons.  This is getting a little frustrating at this point.


I'm currently in the process of emptying the grinder that currently has the siezed wheels. As they get cleaned I'll post pics.  I'm really hoping this isnt due to something stupid on my part. I've been careful to disassemble and reassemble exactly as they were.  Seemed to be working fine with the lube in there other than tainting the chocolate. But now that it's cleaned, not seeming to work right.

I use these for prototype batches, looks like you have stone dust and or food grease with gray metal wear particles dissolved in a sea of CB?

Did you 'run-in' the grinders with a 1lb of sugar before use?  You do need to bed in the stones before making product. A 30 minute run with sugar helps settle the stones against the base stone, then discard and wash up.  That said, before you use the grinder for the first time undo the nuts holding the wheels on and clean and grease the spindles with some FDA legal food grade grease (Lubriplate FGL-2) it will stop the sugar getting into the stone's bushings.  Personally, I've found the stainless steel shafts the wheels revolve on to be a bit soft and the shaft will wear / gall if any grit gets between the bush and shaft.   The stone dust (granite) and even some unrefined sugars are effectively a form of grinding medium.   Once you have bedded the stones, discarded the sugar and wash and dry the set up,  you can wipe off the shafts to remove the food grease, it's a DELRIN (as Erin pointed out) bushing really should be self lubricating.

Also, when making chocolate with a Premier I never add sugar before having nicely liquid cocoa and or cocoa butter circulating to prevent any particles getting into the shafts.   I will also sometimes 'grease' the spindles with CB after I clean my grinders and reassemble for the next batch.   The premier grinders are a great small batch option but the spindles and bushings are the one thing that is less than ideal from a santitation point too.


updated by @powell-and-jones: 02/13/16 10:18:06PM
timwilde
@timwilde
02/10/16 05:51:35PM
36 posts

Ok, because of the 2am cleanup finishing around 3am, a little slow at getting the pics up.  However, the lube appears to be cb with granite dust. In one of my last batches of 2-ingredient dark chocolate I found a big glob of it with the last 8-10oz of chocolate. I've poured that in a container un-tempered to solidify before throwing out. Looking at it now, it's cb. It has the same temper/texture/solidity that the cb immediately around it has, only it's pitch black with some sort of metalic sparkle to it (hence when seeing it in liquid form looked like a separate lube).

I've done the dry sugar thing on my Santha, but that was several years ago. I was told in some posting or another in the years since that it's not a suggested practice since it's a wet grinder and can damage the machine by running dry foods through it.  I take it that's gone back to standard practice again?

What I have done to clean, other than running 4 batches of chocolate through one machine and 2 batches through the other, is I've poured hot water and a degreasing soap into the machine and let it run for a few minutes. Took it apart and washed/scrubbed thoroughly as a first cleaning procedure. 

As a secondary suggested procedure to knock and collect dust, I did run an oil/sugar mix through the machines for about 2 hours. It discolored the oil but I've since cleaned that out. 

I'm thinking at the moment, the biggest worry is the seizing wheels. I'm not sure what could be causing that, and I'll have to take the wheels out into daylight to see if there's scratching or marring on the white bushings that I cant see in the indoor lighting for some reason. It's worrisome because it's happening on 2 assemblies, not just one machine. 

Since I have one machine open with a newly cleaned and dried wheel assembly, I've run the dry sugar through for about 45 minutes. That did not discolor the sugar, and I'm in process of cleaning that out and getting it dried again. The other machine I'll have pics posted of the chocolate free siezed wheels and they're disassembly up as soon as is possible.


updated by @timwilde: 02/10/16 05:56:09PM
Powell and Jones
@powell-and-jones
02/10/16 07:25:33PM
30 posts

timwilde: Ok, because of the 2am cleanup finishing around 3am, a little slow at getting the pics up.  However, the lube appears to be cb with granite dust. In one of my last batches of 2-ingredient dark chocolate I found a big glob of it with the last 8-10oz of chocolate. I've poured that in a container un-tempered to solidify before throwing out. Looking at it now, it's cb. It has the same temper/texture/solidity that the cb immediately around it has, only it's pitch black with some sort of metalic sparkle to it (hence when seeing it in liquid form looked like a separate lube).


I've done the dry sugar thing on my Santha, but that was several years ago. I was told in some posting or another in the years since that it's not a suggested practice since it's a wet grinder and can damage the machine by running dry foods through it.  I take it that's gone back to standard practice again?

What I have done to clean, other than running 4 batches of chocolate through one machine and 2 batches through the other, is I've poured hot water and a degreasing soap into the machine and let it run for a few minutes. Took it apart and washed/scrubbed thoroughly as a first cleaning procedure. 

As a secondary suggested procedure to knock and collect dust, I did run an oil/sugar mix through the machines for about 2 hours. It discolored the oil but I've since cleaned that out. 

I'm thinking at the moment, the biggest worry is the seizing wheels. I'm not sure what could be causing that, and I'll have to take the wheels out into daylight to see if there's scratching or marring on the white bushings that I cant see in the indoor lighting for some reason. It's worrisome because it's happening on 2 assemblies, not just one machine. 

Since I have one machine open with a newly cleaned and dried wheel assembly, I've run the dry sugar through for about 45 minutes. That did not discolor the sugar, and I'm in process of cleaning that out and getting it dried again. The other machine I'll have pics posted of the chocolate free siezed wheels and they're disassembly up as soon as is possible.

Hi Tim,

Do check the 'end float' on the stone wheels, ideally with the washer and M6 nut snugged up the wheels should spin freely but the wheels shouldn't be able to move up and down the shaft much at at all.  These things are a very cheap device,  unfortunately the manufacturing tolerances seem to be a bit hit and miss.   The HDPE bushings are a two piece effort with a piece inserted and glued from each side, there shouldn't be a big gap between the two parts of the bushing inside the stone? 

I've also noticed that on some stones on the ones we have that the bushing is quite a loose fit on the shaft, if there is a bit more end float 'stuff' including dust can get in between the bushing and shaft.  I haven't had the issue you seem to have (yet),  if I needed to correct the end-float I'd probably try re-cutting the thread on the shaft with a M6 die so I could tighten more, I imagine using a thicker washer could also work?   Alternatively, replacing the center assembly might help.  Hopefully, there's not stone /grit worked into the revolving stones bushings, if present it will grind on the shaft as shown by 'witness marks; on the stainless shaft.    Again, these grinders aren't build for HD chocolate making, you can get away with using them, but there apparently are one or two design weakness.

Mark

Erin
@erin
02/11/16 01:47:06PM
30 posts

Hi Tim,

Seems the problem is that the machines weren't initially cleaned before being used.  

Before using the machine for the first time, it is important to clean out the machine to make certain it is free of excess stone, dust and packaging material.  There are instructions for cleaning the machine that come with the machine.  You should initially rinse the bowl and stone holder with wheels well in very warm water until the water runs clear.  Let the bowl and stones dry completely (allowing over night and/or 24 hours to dry, depending on dryness of surrounding air, is a good idea to ensure no moisture remains that could cause cocoa butter to seize).  After the bowl and stones are completely dry, warm cocoa butter to a liquid state.   Turn on the machine and slowly pour in the cocoa butter.  Let the stones get covered in the warm cocoa butter for about a minute or two.    Turn off the machine, empty any excess cocoa butter.  Now you are ready to begin making chocolate. This warm cocoa butter is a great lubricant and also begins the process of warming up the stones.  Using a hair dryer on the stones and/or placing the bowl and stones in a warm (not hot) oven can also help with refinement and keeping the cocoa butter warm initially.

Making certain that all parts are completely dry is important when working with cocoa butter, due to it's propensity to seize when moisture is present.  There was probably some remaining moisture that made it difficult for the wheels to move.  

Make certain the wheels are well situated on the shaft to allow movement. When moving the stone holder down the shaft, you will notice that when the stone holder is correctly positioned down the shaft that the wheels will move when stone holder is rotated around the shaft.  Once you have the stone holder correctly in position, you will be ready to use the top lock to hold it in position.  The top lock places downward pressure on the stones and helps with refinement.  You can reduce the pressure in the begining when you are adding nibs to adjust for the big partical size and slowly add more pressure when the particle size is more similar and smaller.  The top lock should never be more than finger tight.

For your first few batches, start with smaller batches that come half-way up the wheel.  This will allow you to see the stones moving and give you time to learn the cadence for adding ingredients.  Once you've got the hang of it, you'll be good to start making larger batches.

There are Chocolate Maker Upgrades available for the Premier Wonder Grinder that include more robust gears for the longer run times required for making chocolate, long wearing Polyurethane belt and fully sealed ball bearings (much better for working with cocoa butter).  There are also machines upgraded specifically for the rigors of making chocolate called the Chocolate Refiner ( http://indichocolate.com/products/chocolate-refiner?variant=7781420993).

Work is being done on the website to include instructional and troubleshooting videos for the Wonder Grinder, Chocolate Refiner and Tilting Grinder that should be posted soon.  

You can contact me directly from the contact information on the website if you have additional questions, etc.  

Hope this is helpful.

Happy chocolate making!

Erin

Tony.n
@tonny
02/12/16 11:52:23AM
54 posts

I've seen this issue before, is definetly a cleaning issue, Do you spin the granite stone rollers while rinsing with hot water?

Can you describe how do you clean your melangeur? 


Powell and Jones
@powell-and-jones
02/12/16 12:53:07PM
30 posts

[quote="Tony.n"] I've seen this issue before, is definetly a cleaning issue, Do you spin the granite stone rollers while rinsing with hot water?

Can you describe how do you clean your melangeur? 

Tim,

As Tony writes cleaning is key,  for both cleaning and sanitation it's actually a good idea to remove the wheels from the shafts (just need a M10 wrench or spanner).    Clean the bore of the stones with a small 'bottle brush', (Erin could sell them? but easy to find on eBay etc.)   After cleaning we place the stones and drum in a low convection oven set to 100C,  if you are lucky enough to have an oven that can be set this low it's a good way to drive off water and pre-heat before chocolate making.

Hope you have better luck with your next batches

timwilde
@timwilde
02/12/16 04:53:01PM
36 posts

To reiterate: when I got the machines in October. I unpackaged them, ran them under hot water and mild soap and used a scrubbing brush. That was to get rid of any plastics and oils prior to first run.   The first run; again as a cleaning procedure; was to pour hot water and mild degreasing soap into the maching and let it run.  The axles were covered during this time. After running through like that, I took the assembly apart, scrubbed the wheels the best I could, wiped down the axles as best I could and used forced spray of water to clean out the inside of the wheels.  

This area here is too small for any brush I have (bottle brush will not fit).  I have since used my dip tube brush from my keg gear.  It's a tiny brush that requires some force to push through the wheel, bristles are bigger than the hole, so they are indeed scrubbing.

I was able to run a batch of 2 ingredient chocolate through at 72% dark. For prep for this I heat my oven to the lowest setting which is 170F/76.6C and set the assembly and drum separately on sheet pans lined with parchment paper. The assembly sits in the oven for about 1-2 hours, then gets placed on the base. I pour the liquid ingredients in first; i.e. cocoa butter if I'm adding any. If no cb, I begin by adding freshly roasted/winnowed nibs about a handful at a time (maybe .5oz) and let it get somewhat liquid first before moving forward.   It takes about 2 hours to add all nibs in. At that point I let it refine for a minimum of 12 hours before adding any other ingredients (milk, sugar, vanilla, etc). There was no visible or noticable issue with that batch. Other than the premier refined a lot faster than I'm used to (ready in 36 hours).

To clean after a batch of chocolate has been run through, I pull out the degreaser and hot water to remove any chocolate that I couldnt scrape out. I let this soak for a few minutes prior to attacking it with a scrubbing brush. I then use the spray hose to rinse out the bowl and remove any visible chocolate on the wheel assembly. I then take wheels off, and scrub the inside of the wheels and wipe down the axles.  I then wait for it to be mostly dry, then I set the disassembled wheel assembly onto a parchment lined sheet pan into the oven.  This assists in getting the pieces drying.

If I'm going to run another batch that day, I will leave the pieces in the oven for about 2-3 hours to both dry and warm the pieces.  When I assemble, I make sure to tighten the nuts as tight as they were prior to me disassembling. As of thus far, I've been treating the new premiere grinders the same as I have treated my santha grinder.  The santha grinder is still running, zero issues, and have never had a problem with it. In fact I've just replaced a belt on it, first time in almost 8 years that was done.  So I'm going to assume maintenance, cleaning, sanitation is going to be the same?

timwilde
@timwilde
02/12/16 05:13:33PM
36 posts

Here's the pics of the seized assembly at each step of cleaning.

seized_001.jpg
seized_001.jpg  •  69KB

seized_002.jpg
seized_002.jpg  •  127KB

seized_003.jpg
seized_003.jpg  •  80KB

seized_004.jpg
seized_004.jpg  •  61KB

seized_005.jpg
seized_005.jpg  •  57KB

Powell and Jones
@powell-and-jones
02/12/16 05:14:54PM
30 posts

timwilde: To reiterate: when I got the machines in October. I unpackaged them, ran them under hot water and mild soap and used a scrubbing brush. That was to get rid of any plastics and oils prior to first run.   The first run; again as a cleaning procedure; was to pour hot water and mild degreasing soap into the maching and let it run.  The axles were covered during this time. After running through like that, I took the assembly apart, scrubbed the wheels the best I could, wiped down the axles as best I could and used forced spray of water to clean out the inside of the wheels.  

This area here is too small for any brush I have (bottle brush will not fit).  I have since used my dip tube brush from my keg gear.  It's a tiny brush that requires some force to push through the wheel, bristles are bigger than the hole, so they are indeed scrubbing.

I was able to run a batch of 2 ingredient chocolate through at 72% dark. For prep for this I heat my oven to the lowest setting which is 170F/76.6C and set the assembly and drum separately on sheet pans lined with parchment paper. The assembly sits in the oven for about 1-2 hours, then gets placed on the base. I pour the liquid ingredients in first; i.e. cocoa butter if I'm adding any. If no cb, I begin by adding freshly roasted/winnowed nibs about a handful at a time (maybe .5oz) and let it get somewhat liquid first before moving forward.   It takes about 2 hours to add all nibs in. At that point I let it refine for a minimum of 12 hours before adding any other ingredients (milk, sugar, vanilla, etc). There was no visible or noticable issue with that batch. Other than the premier refined a lot faster than I'm used to (ready in 36 hours).

To clean after a batch of chocolate has been run through, I pull out the degreaser and hot water to remove any chocolate that I couldnt scrape out. I let this soak for a few minutes prior to attacking it with a scrubbing brush. I then use the spray hose to rinse out the bowl and remove any visible chocolate on the wheel assembly. I then take wheels off, and scrub the inside of the wheels and wipe down the axles.  I then wait for it to be mostly dry, then I set the disassembled wheel assembly onto a parchment lined sheet pan into the oven.  This assists in getting the pieces drying.


If I'm going to run another batch that day, I will leave the pieces in the oven for about 2-3 hours to both dry and warm the pieces.  When I assemble, I make sure to tighten the nuts as tight as they were prior to me disassembling. As of thus far, I've been treating the new premiere grinders the same as I have treated my santha grinder.  The santha grinder is still running, zero issues, and have never had a problem with it. In fact I've just replaced a belt on it, first time in almost 8 years that was done.  So I'm going to assume maintenance, cleaning, sanitation is going to be the same?

Hi Tim,

I don't understand why you are having problems, you do pretty much what we do with our Wonder grinders in terms of use and cleaning.  I've also found as you mention that the Premier grinders reduce the particle size faster than other brands too.

I guess I should have written 'test tube' brush not bottle brush....  they are quite a bit smaller.  We use an item with about 1" diameter soft bristles but do have to snip the end to get it to go through the bore hole of the wheels.   Again, do you wheels have 'end float' or side to side movement on the shaft with the nuts tightened? Assume the wheels spin freely when clean?


updated by @powell-and-jones: 02/12/16 05:15:58PM
timwilde
@timwilde
02/12/16 05:33:39PM
36 posts

Yes, the wheels will move slightly from side to side down the axle shaft when clean. They spin freely, and no vertical(up and down) movement when the wheels are in place. Both assemblies are like this. 

Gap
@gap
02/12/16 05:38:10PM
182 posts

Yep, I've been told that 60C (maybe 65C by some people) is the upper end of what the epoxies can handle. Personally, when running a "heated" grind, I never take it over 57C.

I have previously run at 60C a couple of times and had the central shaft in the bowl start turning while still "glued" in place.

In terms of machine relaibility, I've used up to 5 Santhas and 4 Premiers in different settings. You may be surprised how UNstandardised these models are. It seems like each time they do a production run, the manufacturers change some aspect of the machine. In my own experience, the Premier Wonder grinders have been better than the Santhas, but both have had issues. I think its really idiosyncratic to themachine you get - some are better than others and it almost seems to be manufacturer independent.

timwilde
@timwilde
02/12/16 05:38:44PM
36 posts

And yes, the expoxies are the only things that have an issue with the heat. Based on what I've been able to find ; which I'll admit is not much so it is an educated guess, is that 180F is the material test rating. 170 is close, but not over what the material should be capable of handling. HDPE (the plastics) are dishwasher safe, meaning they'll withstand the over 200F of a dishwasher drying cycle. And stone...well, stone shouldnt have the issue.

Testing with a surface IR thermometer, the stone never reaches that temp in the time I have it in the oven. It just happens to be the lowest my oven will go.  After 2 hours, the stones read 150F/65C. And yes, I'm cautious as I'm aware of the potential issues there. The epoxy doesnt loosen or budge. It's just as hard and rigid after heating as it is when it's room temp. So I dont fear that to be an issue.

Powell and Jones
@powell-and-jones
02/12/16 05:44:45PM
30 posts

timwilde: And yes, the expoxies are the only things that have an issue with the heat. Based on what I've been able to find ; which I'll admit is not much so it is an educated guess, is that 180F is the material test rating. 170 is close, but not over what the material should be capable of handling. HDPE (the plastics) are dishwasher safe, meaning they'll withstand the over 200F of a dishwasher drying cycle. And stone...well, stone shouldnt have the issue.

Testing with a surface IR thermometer, the stone never reaches that temp in the time I have it in the oven. It just happens to be the lowest my oven will go.  After 2 hours, the stones read 150F/65C. And yes, I'm cautious as I'm aware of the potential issues there. The epoxy doesnt loosen or budge. It's just as hard and rigid after heating as it is when it's room temp. So I dont fear that to be an issue.

 Well I'm out of ideas, if the bushings are fine and secure.   Anyone else solve this mechanical mystery?

timwilde
@timwilde
02/12/16 05:46:42PM
36 posts

Something to note though, I've tested and shown that just the act of refining (no added heat in a room temp of 72F) gets the chocolate up to 146F.  Which is around 63C. The pic below was after about 12 hours of refining, I almost burned my hand checking the side for heat. So out of curiosity I took a temp.

friction_heat.jpg
friction_heat.jpg  •  77KB

Gap
@gap
02/12/16 05:53:29PM
182 posts

That's interesting. My machine runs with the chocolate temperature at 47C initially (1-2kg batch) and comes down to 43C when everything is more refined - which is about 12 hours in. This is with a room temperature of approximately 25C. Your batch size maybe looks a little larger, but that's still a large difference.

We've never had a machine running with the chocolate temperature over 50C (either Santha or Premier).

All I can think of is trying to lube the inside of the wheels/shaft with some ccb as mentioned above.

timwilde
@timwilde
02/12/16 06:01:01PM
36 posts

I'll try the cb lubing the shaft and see if that helps.   The batches I do are typically 100oz batches. (6.25lbs/2.8kg) The 12 hour mark was there to signify that it wasnt any preheating actively heating the chocolate. This was within about 30-40 minutes after I added the sugar so it was at a point of high friction of the grinding/refining process.  This is not common, but noticed it on this particular batch.  Was worried the machine was overheating so I pulled the drum off and checked the machine. It was running at normal operating temps. The santha I've never seen a batch go above 125F/51C.

Erin
@erin
02/13/16 07:39:10PM
30 posts

When adding the sugar the temperature will go up due to the high friction. If you don't want the temperatures to go up that high, you can add the sugar more slowly and/or release some pressure from the top lock which will reduce the friction on the wheels and so the temperature will not increase.  Releasing pressure from the top lock can also help keep your stones spinning if they get stuck.

The bearring material is Delrin (not HDPE) and is stronger, longer wearing, can withstand higher temperatures and is  FDA certified and heavily used in the food processing industry.  

Generally, I wouldn't recommend putting your bowl and stones in the dishwasher.  Melting temp of Delrin is 347 degrees.  

It's great and consistent with our feedback that you are consistently getting refinement in a shorter period of time.  Congrats!

Happy chocolate making!

Erin

timwilde
@timwilde
02/13/16 08:07:01PM
36 posts

so, I *think* I have a mystery solved.  At least for the seizing wheels anyway.  The way that the axle became coated as shown in the pics, the materials seemed almost "baked" on in addition to being super sticky. I *think* the assembly wasnt fully dried prior to reassembling. This would add moisture, which would cause problems.  That, right now, is the only thing I can think of that would have caused the seizing the way it did. 

I'm still somewhat concerned with the amount of granite dust and the silvery dust that caked on the wheels though.

I can almost see the granite dust as being a part of the wear in process which would become lessened as the wheels and bowl get used and cleaned properly...but the silvery glimmery material in the pics above is worrisome.

timwilde
@timwilde
02/13/16 08:12:36PM
36 posts

Powell and Jones

Tim  You are correct in that HDPE can take 110C or more, however one of it's less useful properties is its high thermal expansion cf. other types of plastic.   This is a know issue in close tolerance bearing surfaces,  like believe it or not knee replacement joints!   Sit some with a particular style of hinged bushing total knee replacement in a hydrotherapy pool for too long and the knee gets tight!    Perhaps the clearances close enough to bind the wheels if you run up to 64C.    I know commercial conching post refining can use brief high temp but what does the stuff from your Wonder grinder taste like?     I'd be concerned about driving off the flavors I need to keep as well as the off tastes if I ran that hot for long?  

Well, it looks like Erin pointed out that the plastics are made from Delrin.  I can tell from experience with that material that it doesnt expand/contract with heating very much at all.  

As for the flavor of the chocolate that got up that hot, it was good. This was a 2 ingredient batch that was being refined and ended up by getting a little more bitter/cocoa flavors and some of the more delicate notes were cut out.  I cant say it was bad or good compared to normal, this was the first real batch like that with that percentage (77%) that I've made. So I really have nothing to compare it to.

After noting the higher heat though, I did realize that I was kind of taking advantage of the higher sheer power of the Wonder grinders and adding things a little faster than I would in, say, my Santha.  So that may be the sole reason it got quite *that* hot.  Generally, if you're more careful and steady about adding the ingredients, the friction would be limited and thus the heat.

timwilde
@timwilde
02/18/16 07:45:53PM
36 posts

I have an update. Whatever I did, I may have just changed my process and resolved the issue.

I changed too much to say that any one thing was the problem, so I wont venture to guess.

This time, I heated the stones, disassembled in the oven until they were reading 130F/54C

After assembly I added all of the ingredients very slowly.  77oz of cocoa nibs (i dont pregrind) took 2.5 hours. I'd add a little and let it go until they were liquid, then add more, etc.  I also added the sugar after 12 hours and again, it took about 45 mins to add the 23oz of sugar to total a 100oz batch.

Chocolate did get into the axle, but I'm seeing zero grit or granite dust. The wheels never seized, and the batch came out perfectly.  Surprisingly, I didnt even make it to the 24 hour mark in refining before it was done.

Something else I changed, I pulled the batch as soon as it was done.  I'm used to the santha, where if it's done at an inopportune time, I can release the tension on the wheel assembly and let it run indefinately (i've let the santha run for 2 weeks one time with no ill effects on the chocolate batch) 

So, if anyone else is seeing the issue, I might suggest adding your ingredients more slowly and be sure to preheat the drum/stones.  I'm also timing the time I put my batches in so that I can plan around pulling the batch and tempering/molding them up.

My thinking here is that the batch is finishing and getting fine particles sooner than I was expecting, and letting it run longer essentially had the effect of having granite run against granite, creating some of the dust.  I'm also thinking that adding just too much of the coarse dry ingredients also didnt help any at the dust creation.  Having too many of the dry ingredients too quickly also allowed the coarser particles into the axle shaft which allowed wearing down the axle, potentially grinding on the stone inside the gap. 

By all means, if my thinking is flawed; let me know. I've been known to be wrong once or twice ;)

Note: I also put both machines through the dry sugar run, scrubbed them down completely and such in the process. So I think it's the combo of the bed-in process in addition to precautionary steps that combined to bring out a perfect batch. 77% 2 ingredient chocolate came out exactly as expected. I'm going to test on a milk chocolate batch before I try another white chocolate batch.

Thank you to everyone that gave input/suggestions here. It was greatly appreciated!

Nicole Gibson
@nicole-gibson
04/03/16 01:45:15AM
1 posts

Hi Tim,

Just wondering how you are going with your grease issue? My santha has just started doing the same thing. We have pulled it apart and cleaned all the grease out of the wheels and shaft and currently waiting for it to dry. I have been using my santha for 12 months now and never had a problem before.

Did the above steps you have mentioned solve your problem or did the grease come back?

Thanks Nicole.

timwilde
@timwilde
04/03/16 03:29:31PM
36 posts

Hi Nicole, 

I dont think mine was a grease issue afterall. It looked similar to what I see at the bottom of the bowl on the Santha, and had a look like it was trying to keep itself separated from the chocolate.  After looking at some chocolate after it had solidified though, it was most definately not grease. It was a clumping of granite dust.

In the santha, the only thing I can recommend is cleaning out the center shaft and the bottom of the bowl (outside) really well and wipe down (do not degrease) the wheel assembly that the bowl sits on/in.  If you feel the need to degrease I strongly reccomend getting another foodsafe lube to replace the grease on the wheel assembly. I think that grease/lube is necessary to prevent friction of between the two different materials.


updated by @timwilde: 04/03/16 03:30:58PM
James Hull
@james-hull
04/04/16 02:08:41PM
46 posts

Hi Tim,

I had exactly the same issue with my premier grinder a little while, and it makes everything look pretty dammed gross. However....

I found a few ways of dealing with it:

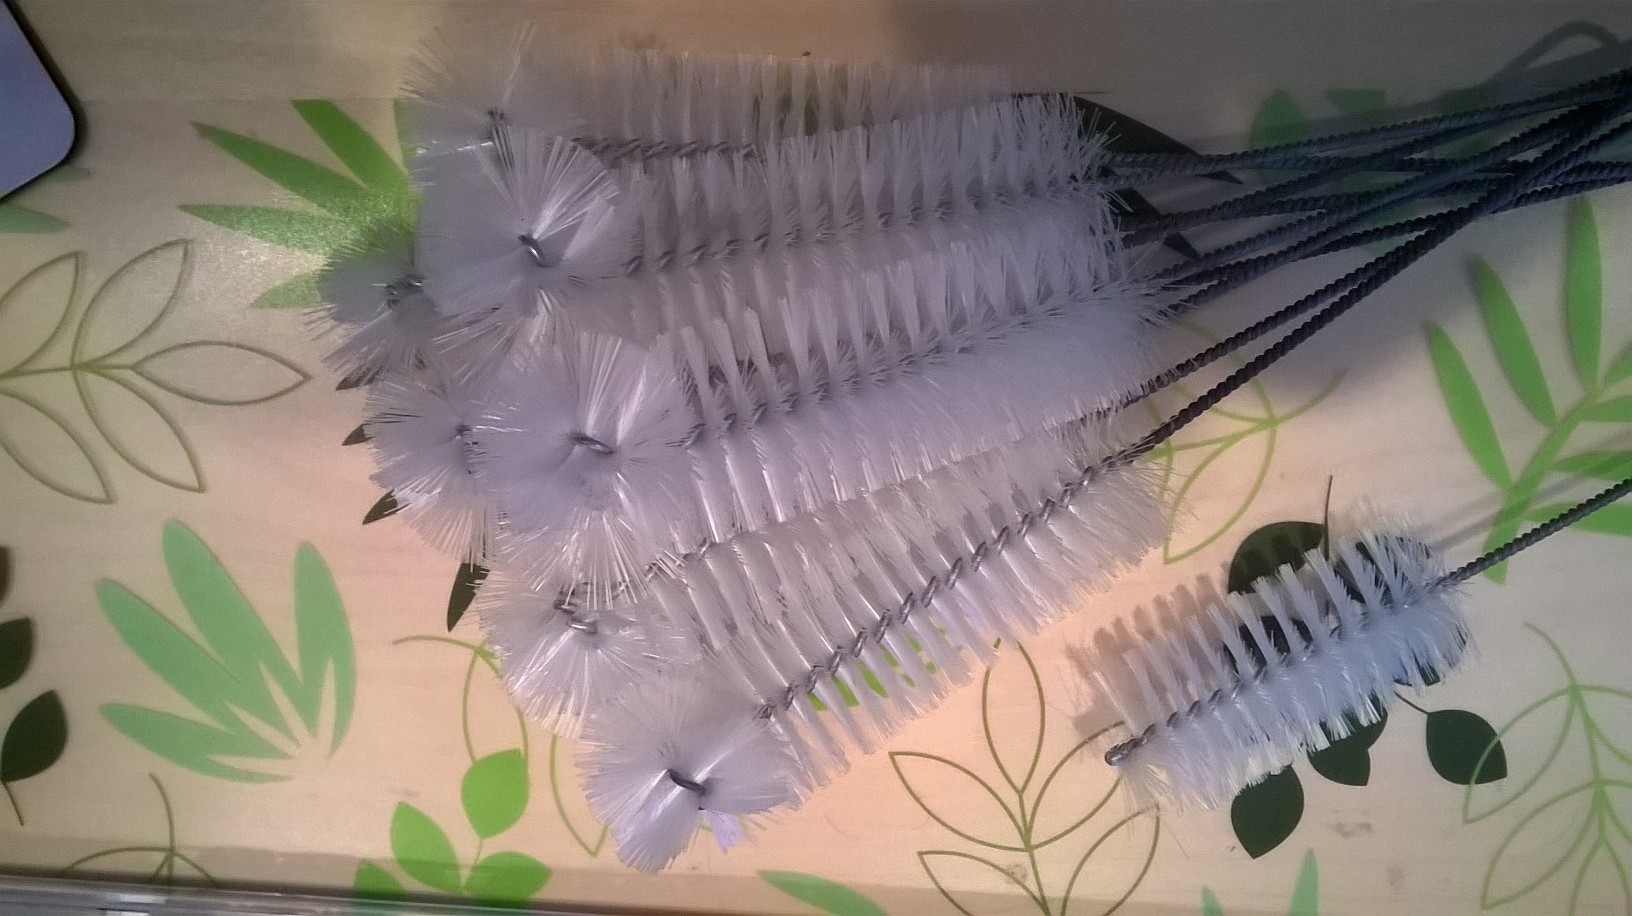
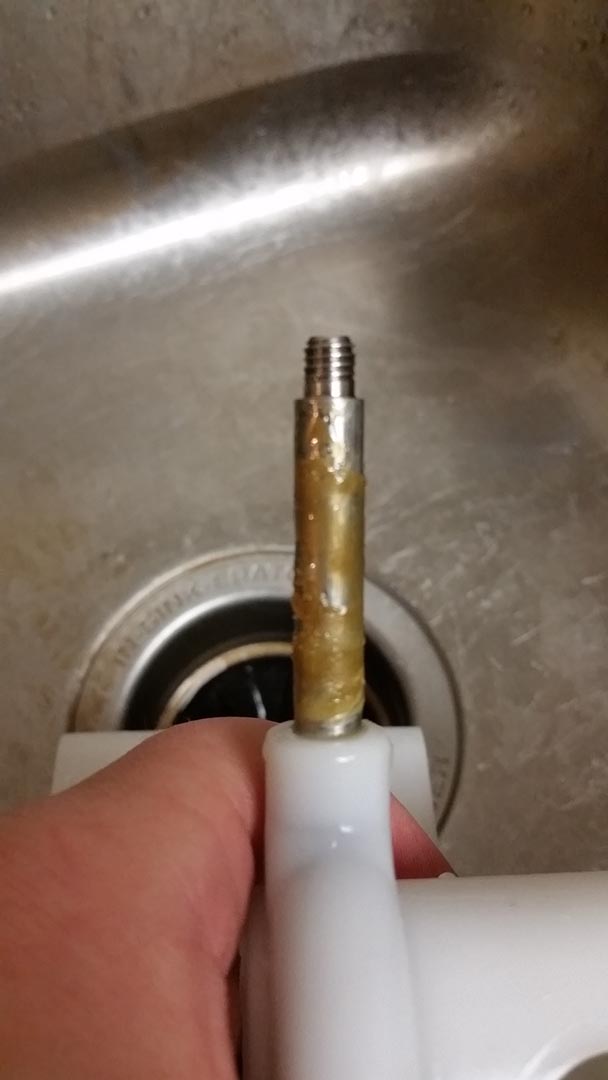
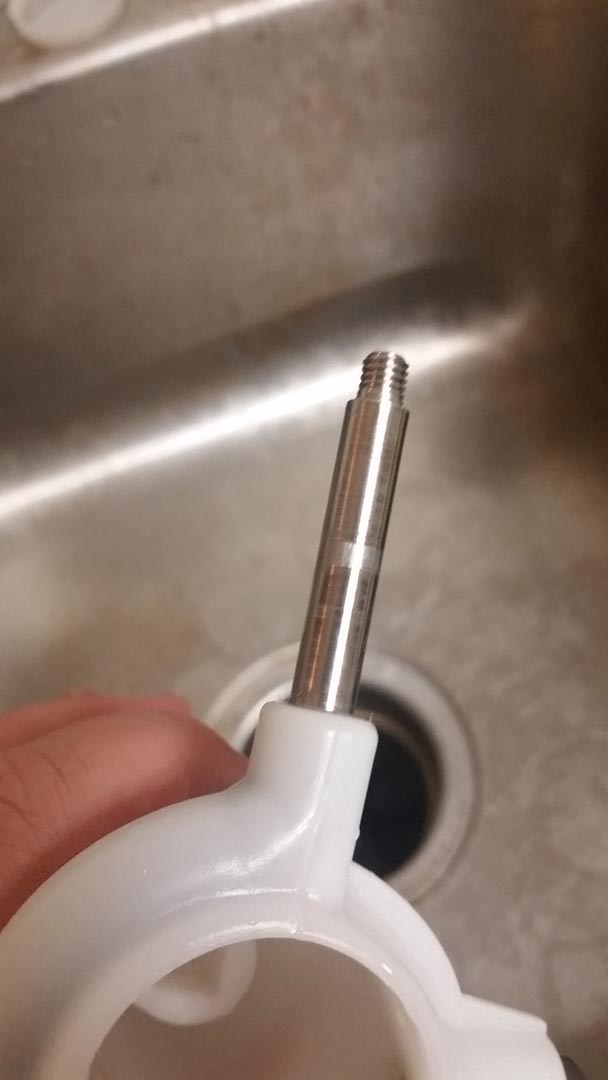
1- after each batch you make clean the grinder bowl and remove the wheels from the axels and clean inside them with a pipe cleaner really thoroughly (as everyone has already suggested) - then dry them in the oven to ensure all water has evaporated

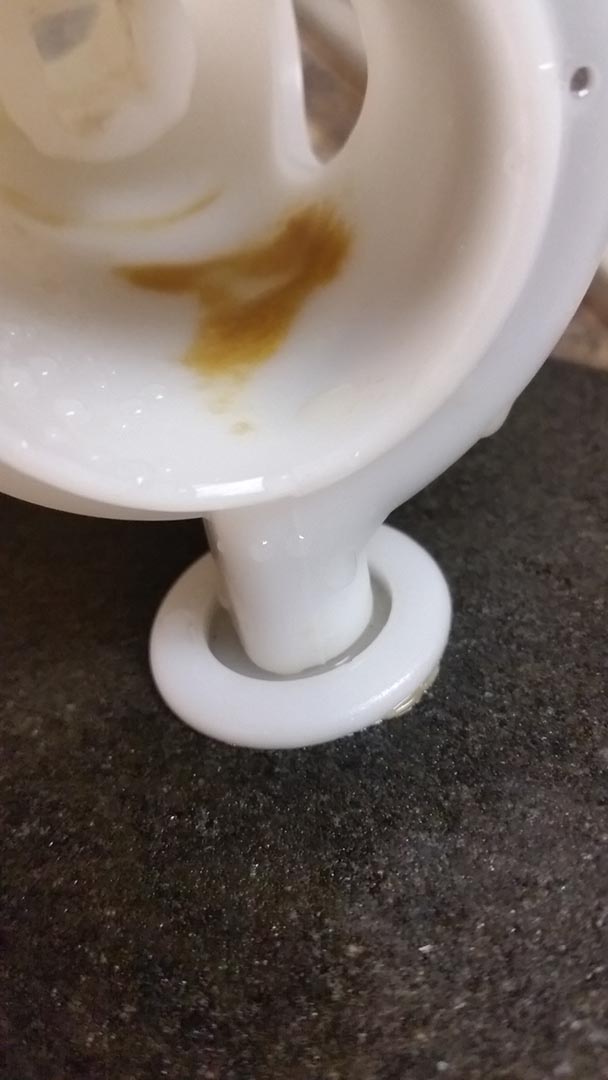
2- when re-fitting the wheels on the axels make sure there is a bit of the axel still poking out from the wheel so that when you tighten the nut onto the washer, the wheelse still move very freely, this is largely only a problem i found by cleaning multiple machines at the same time, as not all the wheelse are made exactly the same width.

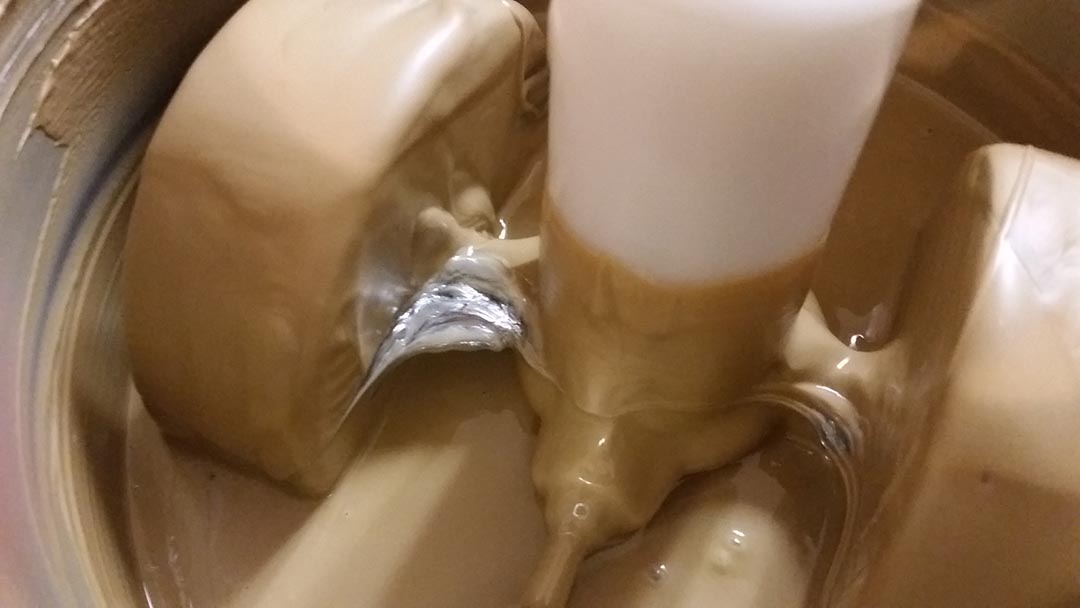
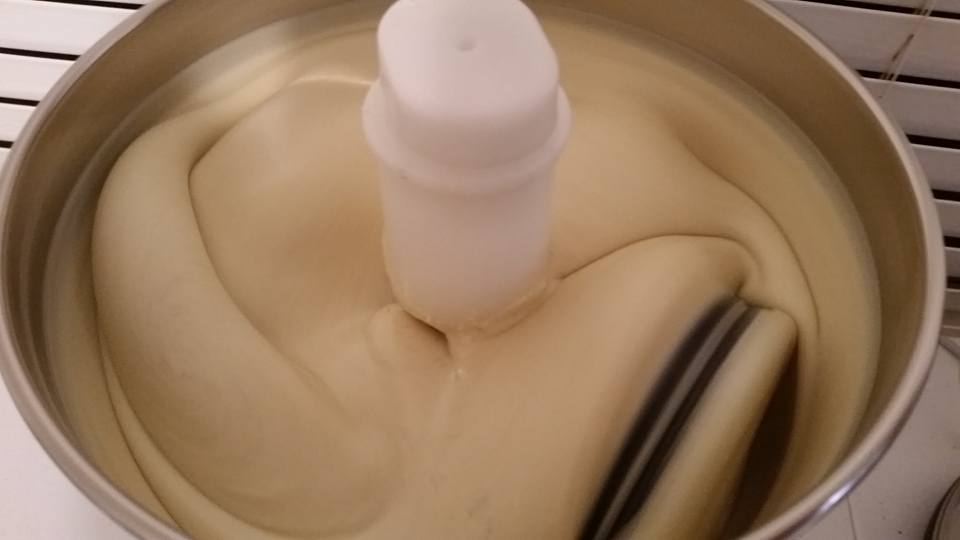
3- adjust the plastic scraper arm thing so that it is not directly up against the metal side of the bowl when you have full tension screwed down onto the stone wheels. This was where i noticed the biggest cause of that grey stuff you see, it actually seems to be largely caused by the plastic scraper rubbing against the metal bowl side and very slowly creating fine metal dust particles. Over a short period this wouldnt cause a problem and wouldnt be noticeable enough (these machine are only made to be used for maximum 30minutes) but over say 12-24hour period like we use for grinding the chocolate and sugar down, these metal particles scrape off, and build up and up and then discolour the chocolate. Similar sort of thing if you ever take bits off a car for example, black stuff builds up parts that rub against each other

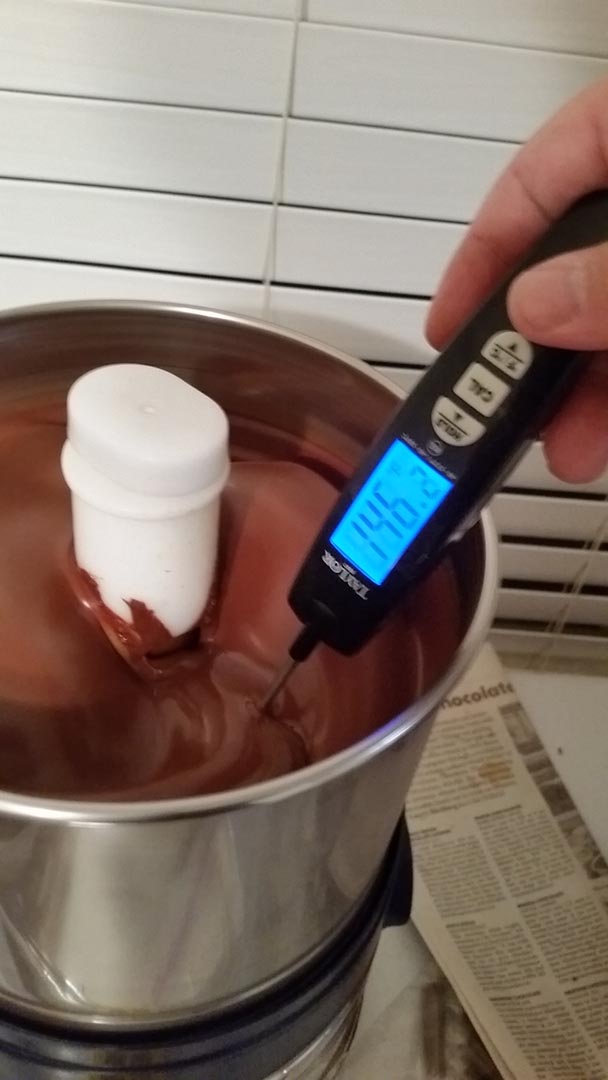
4- warm the bowl and stone wheels with a hairdryer or heat gun before adding ingredients, also helps to warm your liquid ingredients before adding too.

Hope that helps, it worked for me and since have had no problems.

Tags

Member Marketplace


Activity

Keith Ayoob
 
@keith-ayoob • one month ago • comments: 0
Posted a response to "Raw Cacao Beans vs 100% Dark Chocolate"
"@joe-john, I'd like to weigh in on this.  First, some of the nutritional info you post there is reasonable, some is not -- and that's not unusual...."
Tet Kay
 
@tet-kay • 6 months ago • comments: 0
Xocol855
 
@xocol855 • 3 years ago
Created a new forum topic:
slaviolette
 
@slaviolette • 4 years ago • comments: 0
Created a new discussion "Cost of goods produced":
"Hi Everyone, Been a long time member but I have not been in in a few years, the fact is that I had to close down my small chocolate business.. but now is..."
chocolatelover123
 
@chocolatelover123 • 5 years ago • comments: 0
Created a new forum topic:
New Chocolate Brand - "Palette"
Marita Lores
 
Marita Lores